How to install multiple Garmin maps on Garmin devices 2011 MapSource (Tutorial)
This tutorial is only for educational purpose. Don’t use it for your Garmin devices. All maps added to the Garmin have to be paid.
Let’s start explaining the basics of the Garmin maps that you need to know for this tutorial.
MapSource is the program from Garmin Company that produces devices for navigation purpose.
Garmin maps often found on torrents are basically the MapSources of different countries, combined countries, states and ctr. Every map installation for windows has MapSource program in it. So when you install multiple maps you have to install each map separately like you install a new MapSource. Different packs of maps have different ID numbers that distinguish them from each other when registration cod is inserted for them in MapSource program.
Garmin Devices are little computers with display that can navigate you anywhere in the world of course if you had the right map on it. Every Garmin device has a unique device ID and for each device you have to register map for it. Later I will show how to find your device ID.
What do we need for this tutorial?
- MapSources of the maps that wee wont to combine in one map on our garmin device. (found on torrents, and please read comment before downloading maps from torrents) . Some maps like Adria Rute can be found legal on sites directly and don’t need to be pached or cracked to work. Site for AdriaROUTE and AdriaTOPO . For Serbia try to look for SCG Route.
- Maps ID list download here. If you can’t find your map on list it can be probably found on torrent that you downloaded.
- Garmin Unlock Generator v1.5 from 2008 still working even for the new maps.
Let’s begin
- Install all MapSources that you think you need for navigating your device on your PC. Read instructions from where you downloaded the MapSources maybe some have to be pached. Like I sad they can be found on torrents.
- Prepare your device connecting it to PC and backing up all files from it but don’t delete them from device. If you have memory card that is better because bigger maps can be stored and they are not stored in same place with system files and software on Garmin device. If you have memory card two removable discs are going to show on PC. One that have gmapsupp.img file is one that store maps on it so remember that device letter. Don’t worry if you have one disk and system files on it. You can harm it.
- Once you installed maps you will have to generate a unique map unlock code. Why is unique? Because it is generated based on your custom garmin device ID and Map ID. List of map ID-s. To find your device ID connect garmin device, open MapSource navigate to Utilities>Get Unit ID… Copy ID
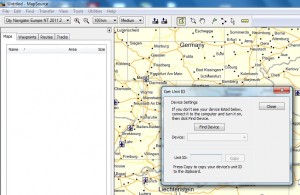
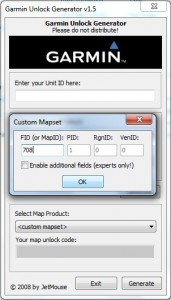
and open Garmin Unlock Generator Paste your ID where it says “Enter your Unit ID here:”. Open List of map ID-s, find your map and copy id for it. If you can find map ID then look for ID in installation files of MapSource. Some maps like Garmin City Navigator Europe 2011 you can find on iptorrents in the headline of the map it says MAP ID 2266. That’s your map ID for that map. Go to Garmin Unlock Generator and in drop down menu select <custom mapset>, window wil open and paste ID in here click OK.
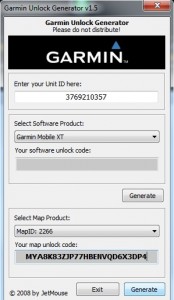
Click second generate button twice. Why twice? Somewhere I read that first generated cod is not valid but second and had some experience on that where I had to do it all over again because of that.
- Now you have code to unlock your map for your device. Navigate in MapSource Utilities>Manage Map Products…>Unlock Regions and click on Add… button. Place your unlock code in first line and comment for that cod in second line. Comment can be anything like owner of the device and name of the map.
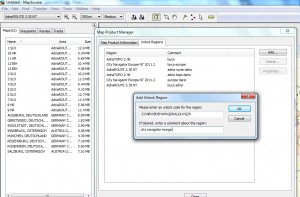
Repeat that from number 3. of this tutorial for every map that you installed. - Now select map from drop down menu in MapSource and Map Tool and start selecting areas in your map that will be transferred to your Garmin device. Once selected part on map change color and you can see in left corner of MapSource what you have selected and how big will custom map be. Selecting twice the same part of the map deselect it. Repeat that from drop down menu for every map that you installed.
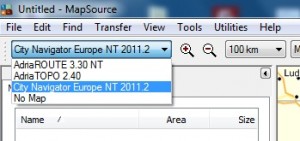
Be careful when selecting maps that have same part. Like Navigatior Europe have Croatia but it’s not so diteled as Adria Route. And don’t put maps you don’t need because big custom map make your device slow processing .
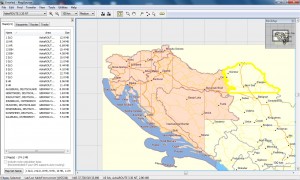
- After selecting it’s time to transfer all maps. Don’t eager on this check your selected maps twice because processing 1GB of maps take’s around 40min to process. Navigate to Transfer in your MapSource and select Send to device. Select proper letter of your device or memory card on your device check only Maps on window and click Send.
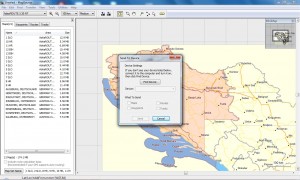
- That’s it! Your device is ready to navigate you. My advice is to you that you don’t use all maps at same time because of longer processing by your device. Instead use only maps that you really need. To do so you can turn on custom maps in your device Settings>Maps>Info.
Hope I helped you understanding how custom maps are made for Garmin devices. Have any question post a comment and I’ll try to help you.

Nice blog here! Also your site loads up very fast! What host are you using?
Can I get your affiliate link to your host? I wish my site loaded up as
fast as yours lol
Hy, Im using TOTOHOST. This is Croatian provider but with servers in Germany.